
Lesson Two: Implementing a Makerspace


Identify ways to implement a makerspace in a classroom or school setting.
How you implement a makerspace depends entirely the needs of your students and what you are most comfortable with as a teacher. When thinking about how you want a makerspace to be run in your classroom I want you to think about your end goal. What is the outcome you are hoping to achieve by having a makerspace in your classroom, school, or community? I also want to emphasize that there is no ‘right’ way to run a makerspace.
Referring back to lesson one, a makerspace is a place where tools and materials are available and where people are collaborating and creating. It is my personal belief that if these three pieces of criteria are met, then what you have created is a makerspace.
I’m going to share with you three different ways you could implement a makerspace along with the guidelines you could use when having students work in these spaces.


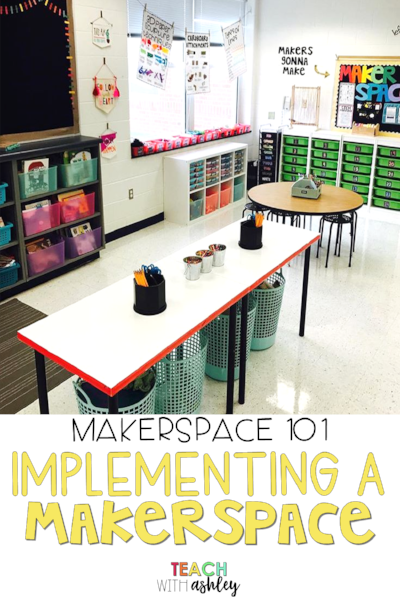
I use the makerspace as a center within my second-grade classroom. My students rotate to the Makerspace daily during guided math and at least once a week during guided reading time. If you would like to read more about how my students use the makerspace during guided math click here. A makerspace could be used as a center across grade levels and for any subject area. A fifth-grade teacher who only teaches science could have it as a rotation students go to once a week. A kindergarten teacher could have a makerspace as a building and exploration center during the day. If you are interested in having a makerspace as a center in your classroom keep in mind the following things.

Just for reference here is a breakdown of how much time my students get at the makerspace each week during math and reading time.
Math: 10 minutes every day = 50 minutes each week*Typically working on one project per week or week and a half*
Reading: 20 minutes once a week*Typically working on a project for at least a month. More long term.


A makerspace doesn't have to be used as a center, it can be used as a place to store all of your materials and tools for STEM projects or challenges too. When working on a whole class STEM project, a makerspace can simply be a place where all of their materials and tools are stored. Students could work at the makerspace, but others can work around the room. Students could be working on the same project or have a choice in what project they are creating.


Makerspaces could be used as an early finisher activity in the classroom as well. Depending on the subject area there could be a different challenge or project each month. Makerspace challenges could align with the curriculum that is currently being taught. A couple of things to keep in mind and ask yourself


When looking at makerspaces from a special education standpoint, there are many ways that a makerspace can be used. One way it can be utilized is as a reward or behavior incentive. When a student accomplishes a goal they could get a certain amount of free makerspace time. A makerspace could also be used as a break for a student. Some student benefit from a calm down corner where they can fidget or do a small activity before returning to the classroom. I know that many special education teachers are limited in the amount of space they have. A makerspace could be a small drawer of building materials that students could use.
A makerspace can be a great place to practice specific goals and skills as well!

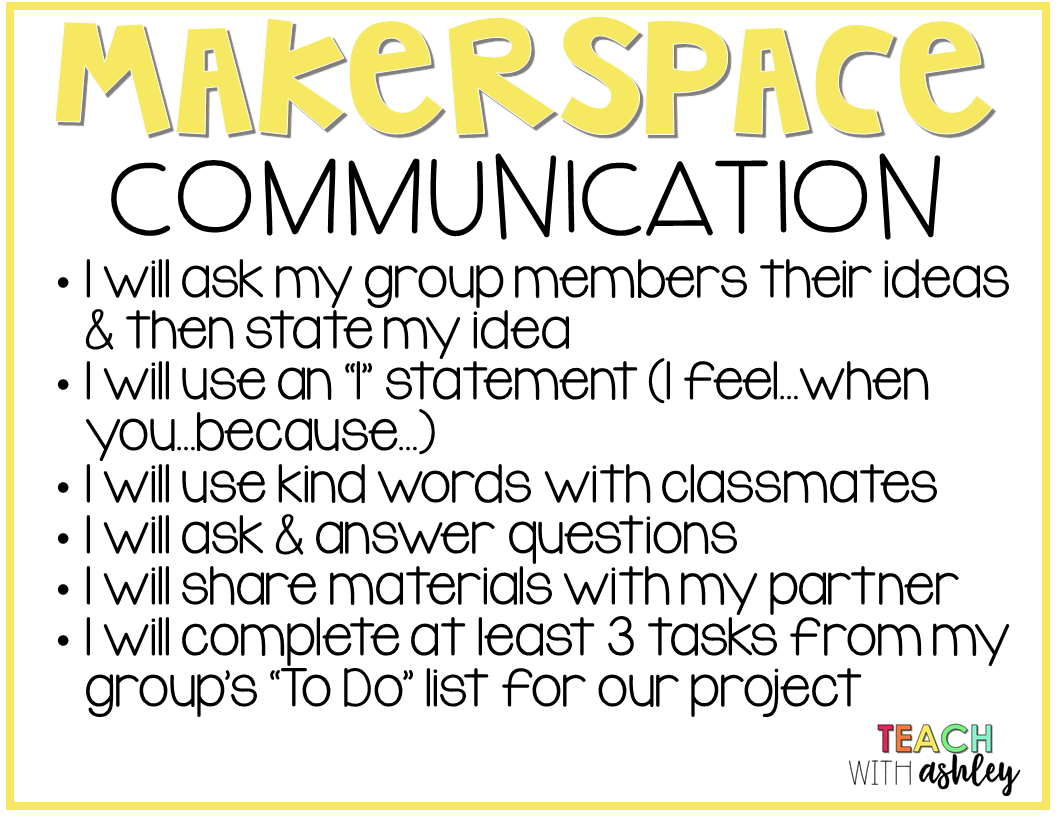
Students are constantly collaborating and communicating with one another when working at the makerspace. Having a makerspace can be a great way to practice communication skills, problem solving skills, and practice how to be a helpful group member. I’ve used checklists in the past to help students who sometimes have difficulty communicating with peers. Checklists would vary depending on the needs of my students, however some past examples are listed below

Many students need to build and have their hands busy during the day. The makerspace is a great place for kinesthetic learners to showcase their knowledge of a subject or skill as well as great practice for fine motor skills.


What kind of makerspace do you want in your classroom or school? What best meets the needs of your learners? Write a statement explaining your purpose for creating a makerspace.

